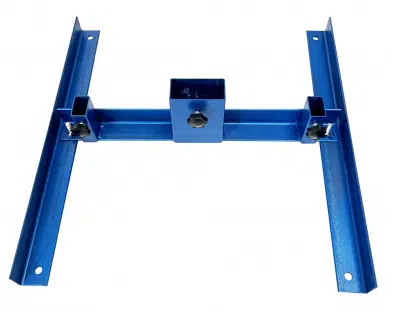
Are you tired of lugging around heavy shooting target stands or spending money on expensive ones? Building your own portable shooting target stand is easier than you might think, and it can save you both time and money in the long run. In this detailed guide, we’ll walk you through the step-by-step process of building a sturdy and portable shooting target stand that you can easily transport to the range or your favorite shooting spot. Let’s get started!
Materials Needed:
Before we begin, let’s gather the materials you’ll need for this project:
- Two 8-foot-long 2x4s
- Four 3-foot-long 2x4s
- Two 1-foot-long 2x4s
- Screws or nails
- Drill or hammer
- Saw
- Measuring tape
- Level
- Staple gun (optional)
 Step 1: Cutting the Wood
Start by cutting the two 8-foot-long 2x4s into four equal lengths of 4 feet each. These will serve as the legs of your shooting target stand. Next, cut the four 3-foot-long 2x4s into eight equal lengths of 1.5 feet each. These will be used to create the cross supports for the stand.
Step 2: Assembling the Legs
Take two of the 4-foot-long 2x4s and lay them parallel to each other on the ground, approximately 3 feet apart. These will serve as the front and back legs of your target stand. Place the remaining two 4-foot-long 2x4s perpendicular to the first two, forming a rectangular frame. Make sure the corners are square, and use a level to ensure the legs are straight.
Step 3: Adding Cross Supports
Now, it’s time to add the cross supports to reinforce the legs of your target stand. Take two of the 1.5-foot-long 2x4s and position them diagonally between the front and back legs, forming an “X” shape. Attach them to the legs using screws or nails, making sure they are securely fastened. Repeat this process on the other side of the stand.
Step 4: Stabilizing the Stand
To prevent the target stand from tipping over during use, you can add additional support by attaching the two 1-foot-long 2x4s horizontally across the bottom of the front and back legs. This will help stabilize the stand and keep it upright while shooting.
Step 5: Mounting the Target
With the frame of your shooting target stand complete, you can now attach your target to the front using a staple gun or nails. Make sure the target is centered and secure to prevent it from moving or tearing during use. You can use paper targets, cardboard, or even steel plates, depending on your preference and shooting style.
Step 6: Optional Features
If you want to add extra features to your shooting target stand, consider attaching hooks or shelves for storing ammunition, ear protection, or other shooting accessories. You can also paint or stain the stand to protect it from the elements and give it a personalized touch.
 Wrapping Up
Building your own portable shooting target stand is a rewarding and cost-effective way to enhance your shooting experience. With just a few simple materials and some basic woodworking skills, you can create a sturdy and reliable stand that will serve you well for years to come. Whether practicing your aim at the range or honing your skills in the backyard, a DIY shooting target stand is a valuable addition to any shooter’s arsenal. So gather your materials, roll up your sleeves, and get ready to take your shooting game to the next level! Not a DIY kind of of guy? No worries, check out our VISM Steel Target Stand!
And, when you need gear, gun parts, or accessories, KM Tactical has you covered. If you have a question about a product, feel free to give us a call at (816) 844-909 or drop us an email at orders@kmtactical.net.

 Step 1: Cutting the Wood
 Wrapping Up

